Becca Groves Header
 photo home_zps1cc7d3c8.png photo start_zpsa2c6c1a1.png photo motherhood_zps5b7bd8a5.png photo grovestead_zpsa872b0de.png  photo bees_zps9cbb22f2.png  photo contact_zps6de91cd9.png
Showing posts with label recipes. Show all posts

notes in a cookbook


So here's a super fun idea from my mom. Record when you made a certain recipe right in your cookbook. I was at my mom's on Friday and decided to make cookies with Mara, Sonna and Svea. I opened this well loved Shepherd of the Valley cookbook and found this page with our favorite oatmeal cookie recipe. And it made me laugh out loud.

First of all, I did the math and Annika and I first made these cookies over TWENTY years ago. What on earth. October 1991. I was in forth grade. Then again in 1992 and a couple times in September of 1993, once with my great life long friend, Jenny Snyder.

The best part is my own handwriting adding a bit more detail to the directions. I remember the first time I tried these on my own and I followed Genevieve's directions as they were written. Which left me quite confused as to when the eggs and butter should have been added. The dough was terrible and they didn't turn out. We were out of butter so I couldn't start over and I was so frustrated. Look at that arrow and sad face next to Genevieve's name! (She has now passed away, but man I love church cookbooks. I love that you know these people!)

Mara added our names with 2012 so that in another twenty plus years, we can come back and see what we made.

And then the girls took turns holding Baby Elsie.


My sister Annika just told me that Mara has been telling people, "My aunt was making these cookies all the way back in 1922." 

egg in the hole?!!

I am working my way through Pioneer Woman's cookbook and thought it was so odd she put a recipe in there for a piece of bread with a fried egg in the middle. Her cooking is always a bit more complicated than that.

But last night, as a last ditch attempt at supper (we're low on everything...) I decided to give it a go.

And oh my goodness, it was good. It wasn't just eggs and toast. It was like something different, with some egg baked into the toast, and the toast in ready position to sop up the runny egg. I don't even usually like sunnyside up eggs, but with enough salt and pepper I am a believer in this SUPER EASY and hey-that-felt-like-a-real-dinner recipe.

Here's her "recipe." I have a feeling I am really behind on this one. My guess is that many of you were raised on this, but egg in the hole is a new find for me, and I couldn't be more happy to have found another easy-peasy supper to add to the mix.

here's what's cookin.


I've been cooking lately. That's a big deal. I'm sort of an uninspired cook usually, excited to find ready-to-heat meals at Trader Joes, excited to make another eggs and potatoes breakfast-for-supper sort of meal. But lately, I've been chopping. And grating and things have been bubbling and my house smells amazing.

I'm not sure what brought about this change. I think seasonally, when it gets so cold, there is something in a Minnesota mama that wants to get her family real close and feed them warm things just to ward off the offensive temperatures. So we've had lots of soups and hotdishes.

I also read a quick read called My Homemade Life, a food memoir that painted a picture of the process of cooking that sort of challenged how I see myself in the kitchen. Typically, my goal is to get food on the table, bellies full and the kitchen cleaned up so we can move onto the next thing. This book made me wonder if I'm missing the joy involved in the simmering, the smelly garlic fingers that linger for days, the actual process.

This little shift has helped considerably. I'm not afraid to try new recipes. And as the food memoir recommends, I follow the instructions and ingredients exactly. That's always been my biggest problem. The Scandinavian in me tries to omit the chili peppers, and then wonders why her corn chowder is so bland. Well, I committed to the chile's and that recipe is pure gold.

So, since this little blog is my own journal of life happenings, and because I hope to reference these recipes that shined a bit brighter than the others, I thought I'd post the favorites with hopes of more chopping and mincing and simmering.

Pioneer Woman's Corn Chowder with Chiles
Land a livin. This was so good. Full of cream and butter and bacon, I welcomed it all and it did not disappoint. We ate most of a loaf of crusty bread with it, and that was key. It's a soup for dipping. Pioneer woman is not afraid of butter and cream, and I decided not to be either. But if you are, her recipes will freak you out. They will terrorize you in the night. But I'm not scared.

Pioneer Woman's Lasagna
I used her recipe from the cookbook, which is slightly different than this one on her website in that it uses fresh basil and parsley, and honestly, after eating it with the fresh stuff, I think I might be too snobby to go back. It was utter perfection for a lasagna. Saucy, but didn't fall into a soup when I served it. I mean, perfection.

Paula Dean and Jessica Sprague's Chicken Noodle Soup
I think I've blogged about this soup three times now. It is just that good. We use broth instead of stock and like that much better. And also we cook our own chicken breasts in the oven (using this method for oven roasting) and have much juicier chicken that way. And then we never add the noodles to the soup until it is time to serve. We cook them seperately and mix the soup and noodles in our individual bowls when it's time to eat. They don't get soggy and that's important. And I leave out the cream and Parmesan cheese, but will sprinkle some mozzarella on it if we've got it.

Tuna Noodle Casserole
I had a hankerin' and it wasn't going to go away. I doubled this recipe and it was fantastic. Hit the spot. And spots for days after as it made so much.

And another super easy, I love this meal: Trader Joes Naan bread (toasted), Hummus, Tzatziki Creamy Garlic Cucumber Dip, and chicken breasts seasoned with Lawry's and covered in fresh squeezed lime juice. This meal takes 10 minutes to put on the table and Rory will comment the whole time, "we should have this once a week." It's easier than frozen pizza!

Alrighty. Enjoy. Happy Eating. I sure am happy when I eat.

Canning 101, part 2

My grandma just sent the Martin County Living magazine to me. My aunt Louie is on the cover this month for her canning! (Her name is really Mary Lou, hence the nickname. I've never called her Mary a day in my life.) She is the MASTER canner. She has a room in her basement filled with all of her canning: peaches, tomatoes, V8 juice, spaghetti sauce, tomato soup, dill pickles, green bean pickles, beats, lots more...She literally starts sometime in June and cans all throughout the summer and fall. She has a huge garden and spends three months preserving her harvest.

I think this is why I was intimidated by canning. Because Louie goes gangbusters. But now that Rory and I have given it a whirl, it is not as overwhelming. And it turns out that Aunt Covergirl is one handy and well studied resource for canning tips and tricks. Her tomato soup recipe is out of control good...more of a bisque with texture than the thin tomato soup you're used to.
Here are the fruits of my first canning attempts. From Left to Right, Tomato Soup, Rhubarb Sauce, and Spaghetti Sauce. We have 10 jars of soup, 12 jars of rhubarb and 3 jars of spaghetti sauce. Aren't they so pretty?

Just a few reflections from these three successful attempts at canning:
1. Did you know that pureed, raw tomatoes are pink? When we made the spaghetti sauce we were so weirded out by this. Once the mix started cooking it began to turn that bright brilliant red, but for a while it looked...not delicious. It reminded us of when we were in Tanzania and ordered french fries. We were so excited for some comfort food but then the ketchup came and it was hot pink. We couldn't figure out what it was: turns out it was raw tomatoes mushed up. Ketchup in its purest form.

2. Sharing your cans of goodness with someone is really top honors. You should feel very, very loved if someone gives you a jar of their homemade jelly or a pint of their pickles. These jars become a part of the family and we are keenly aware of the number of jars we have left at any given moment.

3. You should really use canning salt when a recipe calls for canning salt. Not table salt. And just because you really like salt, you shouldn't add additional table salt before your spaghetti sauce reduces from a kettle full to three pint jars. It was tasty, but I do think we were hypertensive for a week or two.

4. The part of me that really likes color wants to can peaches and pickles to add more color to the shelves where we keep our canning. It would make for such a lovely rainbow.

5. It's more fun to can with a partner. Rory and I canned the Rhubarb and Spaghetti Sauce, Mom worked her magic on the tomato soup.

Alright. Well that concludes my thoughts on canning. I'll leave you with Aunt Louie's tomato soup recipe. Even if you don't plan on canning, you should give this one a whirl. (though you might want to cut it in half, or quarter it...) It is so good and hearty!

AUNT LOUIE'S TOMATO SOUP
24 cups of tomatoes, chunked
2 bay leaves
20 celery stalks
10 large onions
2 large green peppers

1 cup flour
1 1/3 cups butter, melted
1/2 cup sugar
8 teaspoons canning salt

Chunk vegetables, cook for 35 minutes. Put through food processor (or blender). Combine remaining ingredients, add to above mixture. Cook for five minutes. Pour into hot jars, process to seal in hot water bath- 15 minutes for pints, 20 minutes for quarts.

Yum and Yum. It's a winner.


canning 101, part 1

I've been sitting on these pictures for quite some time (since June) but have been wanting to post about a new skill we have acquired: canning.

First though, a story. All of this rhubarb came from Mom and Dad Groves. From an enormous rhubarb plant that someone planted on the side of their house without asking their permission. That someone was me. And I did it in haste when we were housesitting for them and my mom brought over a rhubarb plant for my house. Unfortunately we were moving to Alexandria the next day and I didn't have time to drive to Minneapolis to plant it in my own yard. Not wanting it to waste, I decided to dig up my inlaws yard instead.

Heh.

But somehow in the mix of moving, I forgot to tell them that I had dug up their woodchips and planted a large and growing leafy fruit (or vegetable? What is rhubarb?!!). It wasn't until the next year that, while the family was gathered, Mom Groves asked if anyone had any idea where this large plant had come from. And then I remembered that I had forgotten to tell her.

Thankfully she's a good sport and even lets us harvest from the produce-I-planted-without-permission. :)
Now you'd be surprised. Canning is not all that tricky. My bff Heidi let me in on this secret. In my head canning was a huge process that required hours and hours, patience and precision. And maybe this is still all true, but its just not all that complicated. It is a process, and it does require some patience and it does take time, but it's not really super hard. 

Don't count on the following as a complete tutorial. If you're looking for the nitty gritty I'd recommend the Getting Started Guide on the Ball fresh preserving site. It's got pictures and spells out each step in great detail.

But in an effort to debunk the difficulty of canning, let me show you my pictures.
First, you don't need a huge kitchen to can. It might be nice, but it's not necessary. It is necessary that keep everything organized though. As is true with everything, it's more fun and less stressful if you have a nice system in place.

The jars need to be clean and then really, really hot. Some do this in the dishwasher, but this flat skillet worked like a charm for me with the boiling water steaming up the insides of the jars.
I got this handy mcdandy canning gadget kit from Walmart for $6. Every tool in blue that you see was included (the jar grabber, funnel for filling, magnetic lid majigger, and head space measure thingy)
Meanwhile, the lids need to be simmering so they are hot and ready to seal.
Using the funnel you fill your hot jar with your hot food to be canned. Each recipe will tell you how much "head space" to leave. Most of the time it's just 1/2 inch of air at the top.
This magnetic grabber is similar to that fishing game where you have a magnetic pole and try to catch the plastic chomping fish who open and close their mouths as they circle round and round. It's good to find the grown up version of toys you love.
Then you wipe the rim, ensuring no food got in the seal, and screw down the ring (which is not hot so your fingers will not get burned.
You put your cans in the water, making sure they are covered by at least one inch of water. Each recipe tells you how long to boil them, how long to let them rest without any heat. Then you take them out of the water, set them on a towel and wait for the sweetest sound of your life.

The ping of success.

Each jar's lid will ping if it has been sealed correctly. When I first got instructions on how to do this my Aunt Annie said you'll keep track of how many pings you hear. I didn't believe her. How would I keep count of all 12 cans if some of them ping right away and others not for an hour or so?

But guess what? You do. Because they are like your little babies now, and you're proud of them and somehow you do keep count all night long and you say excited things to your husband when he comes in the house like, "We've got NINE pings!"

Of course, if you do lose count, you can also check them. If the lid clicks up and down then it didn't ping (which means it didn't seal properly) and then should be eaten within the next few days. But so far, I've heard that sweet sound for every jar I've canned.

I think the greatest trick is this: don't be afraid of canning in small batches. I have canned three times this summer/fall and none of it felt overwhelming. My Aunt Louie cans enough to feed Martin County, and I may get there. Hennepin County has a lot of mouths to feed though, so it might take some time. But until then, as a newbie, start small. It's still seriously satisfying.

Secondly, the bigger challenge in canning is that you are basically prepping a whole recipe AND THEN going through the process of canning. I think it might be smart to split it into two days. Make your sauce and then reheat it the next day for the canning. It's the cooking and canning in the same day that makes it a process. Either task on its own is not that huge of a deal.

Hope you're enlightened. We are so fortunate to have a grocery store with all the canned goods we could ever want. Can you imagine our grandmothers canning to ensure enough food for the winter?!! Now that would be stressful! But this is fun and empowering. Give it a whirl sometime.

more homemade granola bars


Last year I made Starbucks granola bars to take to camp for a healthy staff breakfast. I have been thinking about them a lot lately because I eat a granola bar every day. A hearty granola bar hits the spot for this nursing mom. But my guess is that it isn't really the healthiest habit, especially when I really don't know what is in the store-bought granola bars.

So I looked for another recipe and hit the jackpot. I filled it with all good things, cut the sugar and they are divine. So good that the pan is almost gone (next goal: moderation). These things are so satisfying. I love peanut butter and honey and oatmeal and raisons, so really it would be hard to go wrong with a recipe like this. I made mine with raw almonds, raw walnuts and raisons and they turned out superb.

I found my recipe here, at a food blog called Smitten Kitchen. Yum. I'll be working on variations of this recipe for a long, long time. I'd actually like to try to add in a lot of the starbucks healthy grains (wheat germ, wheat bran and flax seed) to this new recipe. And today I purchased Agave Syrup to try to replace the sugar and honey. I'll keep you posted as I search for the *perfect* granola bar.

part of this complete breakfast


I've got a recipe to share with you this morning. It's my grandma's oatmeal. She has completely changed the way I look at oatmeal and now I eat it every single morning. For real. I haven't missed a morning since the bowl she made for me in Mesa.

It's because this isn't really oatmeal. It's like hot granola cereal when she's done with it, and it is so divine. And it keeps me full easily until lunchtime.

Grandma's Oatmeal: (single serving)
Place 3/4 cup water, a few dried cherries, a small handful of raisins,
and a dash of salt in a sauce pan and bring to boil.

In the meantime crumble a few black walnuts in the bottom of the
bowl you'll eat your oatmeal in. Cut 6-7 grapes in half. Add those to the bowl.

Stir in 1/3 cup quick oats to the boiling water. Turn down heat
and stir occasionally until the water is absorbed.

Spoon oatmeal onto walnuts and grapes.
Dab on some butter and sprinkle on brown sugar.

THIS IS DELICIOUS. I use Steel Cut Oats because I once heard dr. oz say they're really good for you. And I don't really use that much butter or brown sugar. There is so much other stuff going on in this oatmeal that these two aren't quite as necessary as they are in a typical bowl of oatmeal.

The grapes are crazy good. You know how oatmeal usually sort of coats your mouth with mush? The grapes sort of cut through that because they're so juicy. I would have never thought of putting grapes in oatmeal, but Grandma did and now we know.

So enjoy. It's a fantastic, cozy way to enjoy a hot breakfast in the cold of winter.

grandma's caramel rolls

I have to begin this post on caramel rolls with a confession. I am a bit phobic of yeast. Not in a I'm-afraid-it-will-beat-me-up-in-a-dark-alley sort of way, and not even the fact that it is alive and living and tiny. My fear comes from what I might do to the yeast. What if I draw too hot of a bath for its survival? What if the water is too cold? What if the yeast hates me and then all of the work I went through to make the bread is all for nothing. I think about these things and usually opt for making things like monkey bread instead of homemade caramel rolls.

But Grandma was in town last week, and since she has been best friends with Yeast for 93 years now, it seemed like she might be able to introduce us with the most success. After all, I have made caramel rolls with my grandma a number of times throughout my childhood. (Although it should be noted I have never made them while 9 months pregnant. I was utterly exhausted by the end of our baking time together! I had to sit down a few times while my, again, 93 year old grandma stood and washed the dishes by hand!)

We were at my mom's which meant we didn't have a Kitchen Aid. And not having a Kitchen Aid meant that we had to stir in the flour by hand and knead it forever.

The stuff was so sticky. But not for Grandma. Everytime Grandma touched the dough it would become lovely and smooth. She kneaded with ease and made it look so, so easy.

And then she'd let me have a go. And within seconds, the dough would turn to sticky goo, stuck between my fingers, attached like cement to the counter. I was so awkward! This clearly is some sort of practiced and perfected skill and I am a novice. But I did improve over time, and I think Grandma saw some promise in me by the end...

Here she is, fixing my goo back into bread dough.

I kindly let Grandma finish kneading and I moved onto melting the caramel goodness over the stovetop so it would be ready for the rolls.

She rolled our dough and spread butter, cinnamon and sugar all over.
And then we rolled it up.

We cut them up and placed them over the melted caramel mixture.
Then I had to leave in order to make my baby appointment, so Grandma and my mom finished the rolls and brought them over later that night. And I ate more than one. And the baby jumped for joy all night long. Thankfully, I was wise enough to freeze most of them so we'll have some good treats for after the baby comes too.


Grandma's Caramel Roll Recipe:
1/2 cup very warm water
2 T. dry yeast
1 T. sugar
Mix together in a bowl, cover and wait for bubbles to appear.

In a different bowl combine:
1 1/2 cups warm water
1/3 cup sugar
1/2 tsp salt
2 cups flour
add yeast mixture to this bowl. Beat 2 minutes with a mixer

Add to this mix 2 eggs, and beat for 2 more minutes.
Then add 1/3 cup soft butter
Beat for another two minutes

Blend in 4 cups of flour gradually. If in a Kitchen Aid the mixer can handle this. Otherwise, stir in by hand. If you're 9 months pregnant, your breathing might become labored...

Put 1/2 cup flour on countertop and knead the dough for a VERY long time. If you mixed in the Kitchen Aid, you will not need to knead it for so long.

Place dough in a buttered bowl and cover with a towel under a warm light. Let rest for 20 minutes. If you're 93, you might do the dishes during this time. If you're pregnant, you might sit down during this time.

After 20 minutes, knead the dough again. Roll out into rectangle and spread butter, cinnamon and sugar on the dough. Roll into a long log.

In 2 buttered pans on the stovetop, melt the following together:
1/3 cup butter melted slowly
1/2 cup brown sugar
After melted and combine together add
1 T. Karo Syrup

With a scissors, cut the dough into 3/4 inch rounds.
This recipe will make 2 pans of rolls with 15 rolls in each pan.
Bake at 350 for 20 minutes or so.
ENJOY!

sugar cookies

Photobucket

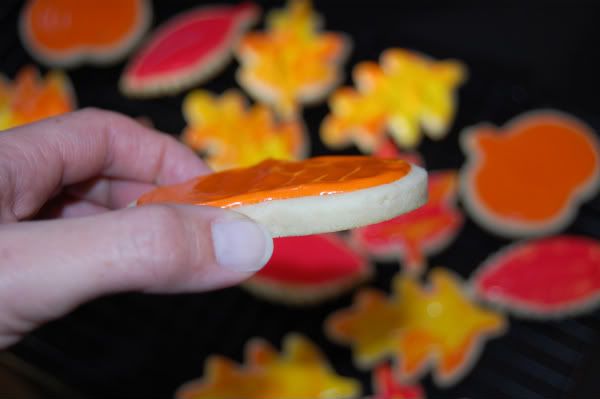
Last February I made frosted sugar cookies during the Super Bowl, and I remember thinking it was so fun to make these typical Christmas cookies at a different time of the year other than Christmas. This week I decided to make them again, since I have super cute fall cookie cutters and every magazine I see seems so inspired and festive for the change of seasons.

My favorite recipe as of late is my sister-in-law, Sara's. This is saying a lot, because my great grandma Anders has held her own as the favored sugar cookie my whole life long. The truth is, they're two very different cookies. Great Grandma's are the kind of sugar cookie where the dough must be cold when you roll it out, it falls apart easily and when you eat them, they literally melt down on your tongue they're so filled with buttery goodness. I love them, but they are a project to take on. You've got to be committed and patient with the super fragile dough.

Photobucket

Sara's are a different ball game altogether. They keep their shape perfectly. The dough is so easy to work with, and the thicker the cookie (in my opinion) the better. They only need to bake in the oven for five minutes, and the recipe doesn't make a ton of dough so making them is not an all day process. In fact, I made and baked these cookies in a bit over an hours time and had the dishes loaded in the dishwasher before an hour and a half had passed. Then I stuck the cookies in the fridge so that I could decorate them today.

These are milk dunkers for sure. Coffee is even better, if you like the stuff. They can soak up a lot of goodness before you take a bite.

Here is Sara's recipe:
1 c. butter
1 c. sugar
1 egg
1 tsp vanilla
3 c. flour
2 tsp baking powder

Cream butter and sugar, on low beat in egg and vanilla. Mix in flour and baking powder a little at a time. Do not refrigerate. Dough will not roll if cold. Cook 6-7 minutes at 400.

*I was able to fit all of my cookies onto four trays. They do not spread, so you can put them fairly close together. I also only baked mine for 5 minutes and they came out great. I really appreciated that the recipe only makes about 4 dozen. It made for quick cookies...

Cream Cheese Frosting:
I deviated from her royal frosting recipe, making my own favorite cream cheese frosting. I added enough milk to make it a bit runny and glossy. And then I used those Wilton's food gels to really punch up the color. Again, I apologize if you are anti food coloring. I just really like the brilliant colors!

cream cheese
powdered sugar
vanilla
milk

I have no recipe or real method to this madness, other than I think the milk helps it look shiny and I usually whip it with my kitchen aid for a few minutes, adding milk and sugar until it looks about right...

My favorite cookie cutter in this mix is the squirrel I got at Betsy's wedding reception. Grey frosting seemed a bit yucky to me, so they are a sweet purple in the midst of all these brilliant colors.

Photobucket

Roy G. Biv

Photobucket
So a few months ago I saw this post about the rainbow cake. I emailed my mother-in-law immediately and told her I had a cake to make for Lisa and Sara's (my sister-in-laws) birthdays and have been excited to make it ever since.

I simplified quite a bit from the original rainbow cake. I used two boxes of white cake mix instead of making the cake from scratch. And then I separated the batter into six bowls, trying to make the amount in each one as even as possible.
Photobucket
Using Wilton's Cake Gel, I added 1/2 tsp of color to each bowl. Honest to goodness this stuff is lethal. If it touches anything it will turn that color...clothing, countertops, kitchen sinks... I took my time with this step and ended up with all the dye ending up in the bowl. I'm pretty proud of this fact. I have a very white kitchen...
Photobucket
Don't you spell Wallah like Viola or something? Because that's what I want to say about the bright colors below. Tada!
Photobucket
I didn't want each layer to bake up too thick, and dividing 2 boxes of batter into six bowls seemed to make the right thickness for each individual cake. I heavily sprayed my cake pan, lined it with waxed paper and then sprayed the pan again. I wasn't going to risk one of these suckers getting stuck in the pan. I had two cakes in the oven at a time for about 20 minutes.
Photobucket
They came out, I let them cool and then mixed up my super easy and delicious lemon icing. It was divine. And runny. And hard to keep on the cake, but it really was good stuff.
Photobucket
from my taste of home cookbook: one 14 oz can sweetened condensed milk, 3/4 cup lemonade concentrate, one 8 oz carton thawed whipped topping. Mix the milk and lemonade and gently fold in the cool whip.
I doubled the recipe, and I used my mixer. Hence the runny frosting. I knew better than to beat the fluff out of the cool whip, and I even thought, "this might not turn out so well" but I was sort of ready to be done at that point and it seemed like a risky shortcut I was willing to take.
I frosted between the layers and used three wooden skewers to hold the cake together when I was all done because this baby liked to slide around and had a serious Tower of Pisa tilt without the skewers.
Photobucket
I frosted the rest of the cake a day later with my friend Amanda and we very much enjoyed watching the drippy frosting melt off the cake as we quickly tried to cover all the color. Thankfully my cake stand has a one inch lip around the bottom. That lip has always bothered me before because it's so hard to frost a normal cake with that ring around the bottom, but today it was an absolute lifesaver. I just let the frosting pool.

Photobucket
Then I threw it in fridge for another few hours to set up and later I hit the road with this beauty to go and track down the birthday girls. Pictures of the cake cutting and the birthday girls are coming later.

Photobucket
(You don't want to know how tempted I was to seatbelted this baby in.)

Once a month cooking

Are you ready for this? Because I think it's the greatest.

A week ago I got an email from my sister-in-law Sara, explaining how she had tried Mimi Wilson's Once a month Cooking. I read Sara's play-by-play and thought the idea seemed like a good one, and that hopefully one day I might even try this method. But I had no real intention of getting the book until I really felt I had the time to put into a day of cooking.

However, things changed when I found a few different links online with sample menu's and sample shopping lists for just seven days. Seven meals I could handle.

The beauty of this system is that you are given a menu of meals that includes a list of things you should have in your pantry, items you need to grocery shop for (in categories, which makes shopping EASY AND FAST) and a list of prep tasks so that by the time you are ready to assemble your meals, all of you chopping, dicing and slicing is already done.

You're basically as prepared as a cooking show, simply dumping all of your prepared food items into the pot.

Let me show you with pictures:
I had most items that were listed on this first list. But if I didn't have something (we didn't have soy sauce, eggs and gallon freezer ziplocks) then I simply turned the page and added that item to the grocery list. I got every item listed out of my cupboards so that everything was ready and waiting for their moment to be used in a recipe.

This might be the very best part. Rory and I split up the list, he took one page and I took the other and we were DONE shopping in 25 minutes. I kid you not. Back in the car and pulling away in 25 minutes. AND...for the ingredients for these seven meals, we spent a little UNDER $70. Ridiculous! (in a really, super, fabulous way) These meals are cost effective because you're buying a lot of things in bulk to be used in the multiple recipes included in your list.
When I came home I followed the list of Preparation Tasks in the order specified. It was easy peasy. Except that I cried hard with the onions. And I got really sicky after shredding the chicken. I actually had to stop and lay down after the chicken. Who knows why that grossed me out, but pregnancy is weird, I will have you know.

After everything is chopped and shredded, you follow the simple recipes and because everything is prepped, this stage goes quite quickly.

Each recipe specifies what size of a storage container you need to package your meals for freezing. It suggests a lot of gallon ziplocks, but I often used tupperware and froze a few meals in more Rory and Becca portion sizes so I ended up with more than seven meals. EASILY.
For real, my wife-worth began to soar as these meals began to stack up. We've had good sandwich stuff and produce in the house all month. But meals have been...lacking.
Not anymore!


By the end, I had a clean counter, meals ready to consume and one lone can of olives. Tough to say what recipe they were supposed to go in. But I don't really like black olives, so I wasn't too concerned. Though they did look lonely.

I took all of my meals out of the freezer at the end for 1) a photo op and 2) to clear out the other things in my freezer to make more room.

This looks super tidy, and it is. But you should see the freezer door! It is overflowing with half used bags of corn and peas and salmon fillets and icecream and coldpacks and sausage links...

***
My bottom line in this process: AMAZING. I will be cooking like this for a great long while. I actually was enjoying myself during the process. Except for when I crashed my head into the cupboard door and the room went black and I cried and quit for an hour until I got my courage back to go face those cupboards again.

I also split my time up a bit. I grocery shopped one night, prepped and made three meals the next morning and completed the final four meals the following morning. It didn't need to take this long, but I really did have some woozy moments with all this cooking in the mornings and I saw stars when I hit my head on the cupboard and both these things set me back.

But all in all, if chicken parts didn't make me gag, and if I remembered to shut cupboard doors, the prep and assembly part of this meal should have just taken me 3 hours.

Now, if you're looking for a few sample menu's here are a few I found online:

Click here for the seven meal menu I used that was FABULOUS and included:
(scroll down to MENU SAMPLER 01 on this webpage)
Chicken and Dumplings
Sweet and Sour Chicken
Lemon Chicken
South of the Border Ground Beef and Corn Pie
Country Style Ribs
Pineapple Burgers
Penne in Cream Sauce with Sausage
So far, we have eaten the dumplings and penne with HUGE SUCCESS. Rory is impressed and very happy.

Click here for a seven meal menu that includes:
Cream Chicken Pasta
Brie Strata
Three Bean Chili
Pesto Grilled Chicken Breast
Spicy Taco Salad
Citrus Salmon
French Stew
Sledders Soup
Tortilla Lime Chicken
Chicken Almondine
Sweet Potatoe Casserole
Beef Flank Steak with Mushroom Stuffing
Apple-Sausage Brunch Cake

Happy Cooking everybody! I'm off to buy Mimi's book because I like her style!